
You will need tome ways to use the interactive a teaching materials for this course (which are in a Jupyter Notebook format). There are some ways to open these notes on your own computer, or via a special website where they are ‘hosted on the cloud’. Below you will find steps for following both routes.
If you’re from university of Edinburgh, jump straight to Method 2: Noteable
Method 1: By using an online service that allows you to ‘run’ jupyter notebooks (This is especially useful if you cannot install things on your computer, eg. because it’s your NHS work machine)
Working in a web browser (no need to install anything on your computer, especially useful if you use computer in a library, or a work machine on which you do not have admin/installation privileges). Until recently for all of those services you needed a subscription (either bought by your school, or by yourself) but that’s not the case any more! YAY!
Method 1: Anaconda Cloud. See video below. (https://nb.anaconda.cloud) is the one that I’d recommend (unless you have a subscription to Noteable, eg. via your university). Follow the link above, then create an account or log in. Once there’s an option on the screen to open ‘Terminal’, click it and type: git clone https://github.com/drpawelo/python-storytelling and that’s it – you should see all the coding notebooks, see below video
Method 2: Noteable – by far the easiest way, but right now only available to students and staff of the university of Edinburgh
Method 2: Noteable (for now only available for participating universities, eg. University of Edinburgh, but you can request a free trial with a button on their main page https://noteable.edina.ac.uk): If you already have subscription, go to https://noteable.edina.ac.uk/login and log in with your university account, click red ‘Start’ button; Once you see a list of file and folders, click ‘+GitRepo’ button and enter this address: https://github.com/drpawelo/python-storytelling (do not VISIT this link, but rather copy-paste that link into +GitRepo)
Method 3: By Installing Anaconda Navigator on your own computer (if you are allowed to install things on your computer. If you’re not eg. because it’s a work or library computer, jump to Method 1 – Doing it online)
Below are instructions on how to do it on your own machine, using Anaconda Navigator, which is a free piece of software. Basically it works as an appstore for all things connected with Python. Below you will see how to download and use Anaconda Navigator in a small number of steps. But if you would like to see a more click-by-click tutorial, here is one someone else made https://sparkbyexamples.com/python/install-anaconda-jupyter-notebook/
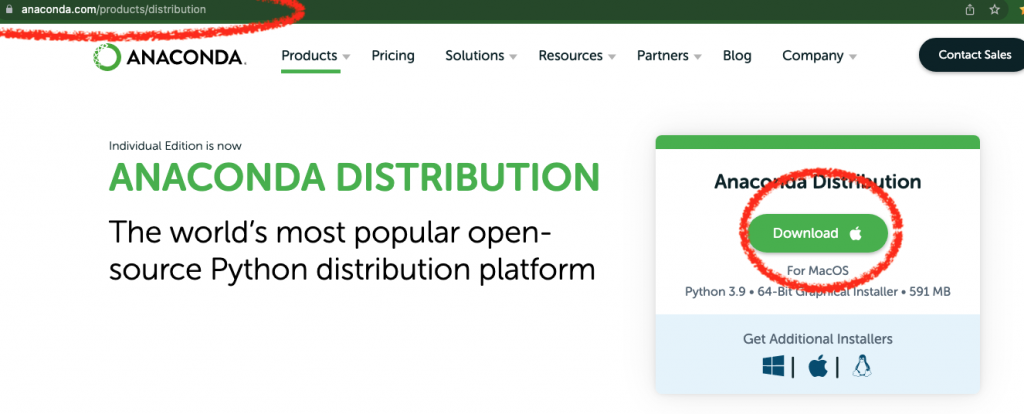
- Go to the Anaconda website and install their Anaconda Distribution/Navigator https://www.anaconda.com/products/distribution. When offered to get all sorts of plugins etc, just say no. What you want is the most simple (but working) Anaconda Navigator. This software is free. To install it you will need admin privileges for your computer, which might be challenging if it’s your work laptop. If that’s the case you might want to have to try one of the online options.
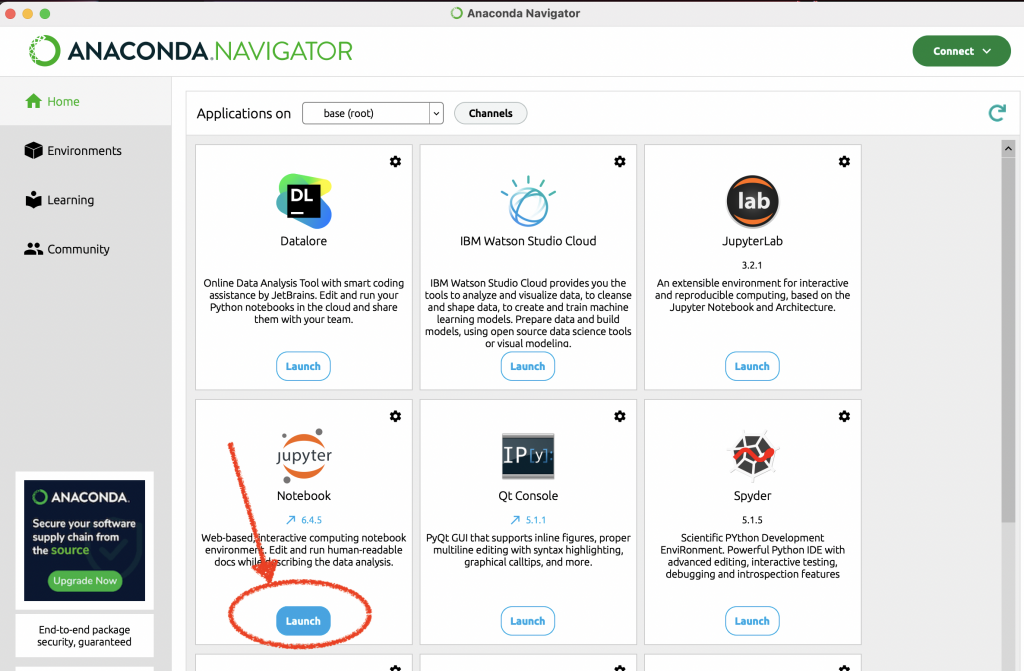
2. Once anaconda Navigator is installed, open it, and in the list of applications Choose “Jupyter Notebook”. It will open in your web browser with the Jupyter Notebook ‘environment’. It will have a slit of files and folders on your computer.
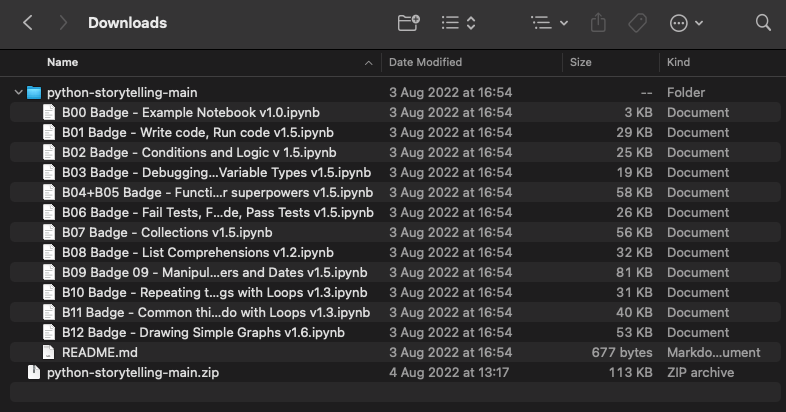
3. Download the notes for the course from this websiye: https://github.com/drpawelo/python-storytelling/archive/refs/heads/main.zip and un-zip/decompress them (on most computers, it just means you double-click them, and the single .zip file turns into a folder with all notes). You will end up with a folder with lots of ‘.ipynb’ files. Unfortunately, these files cannot be opened by just clicking them (like eg. images). You will have to open the jupyter app (or ‘environment’) in your web browser first, and then open the badge notebook files (.ipynb) from there.
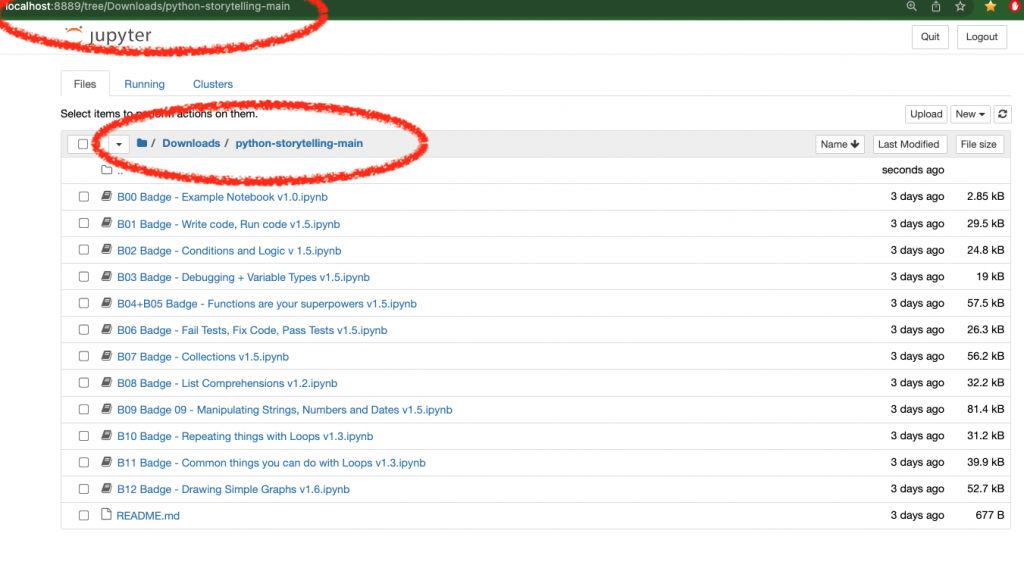
4. In your browser, in the Jupyter interface navigate to the folder where you unzipped the ipynb files, and you should be able to open them, use them for learning and save your changes.
5. When you click one of the .ipynb files from within your web browser, it will open the notebook and will look like below. Select a cell with your mouse, and run it with Shift+Enter keyboard shortcut, or Run button. Keep clicking that keyboard shortcuts or button, to run all of the cells in a row!
